The User Interface
Now that you’re acquainted with the what and why of Phosis, let’s start talking about the how. That starts with the user interface.
Here are the main parts of the Phosis screen:
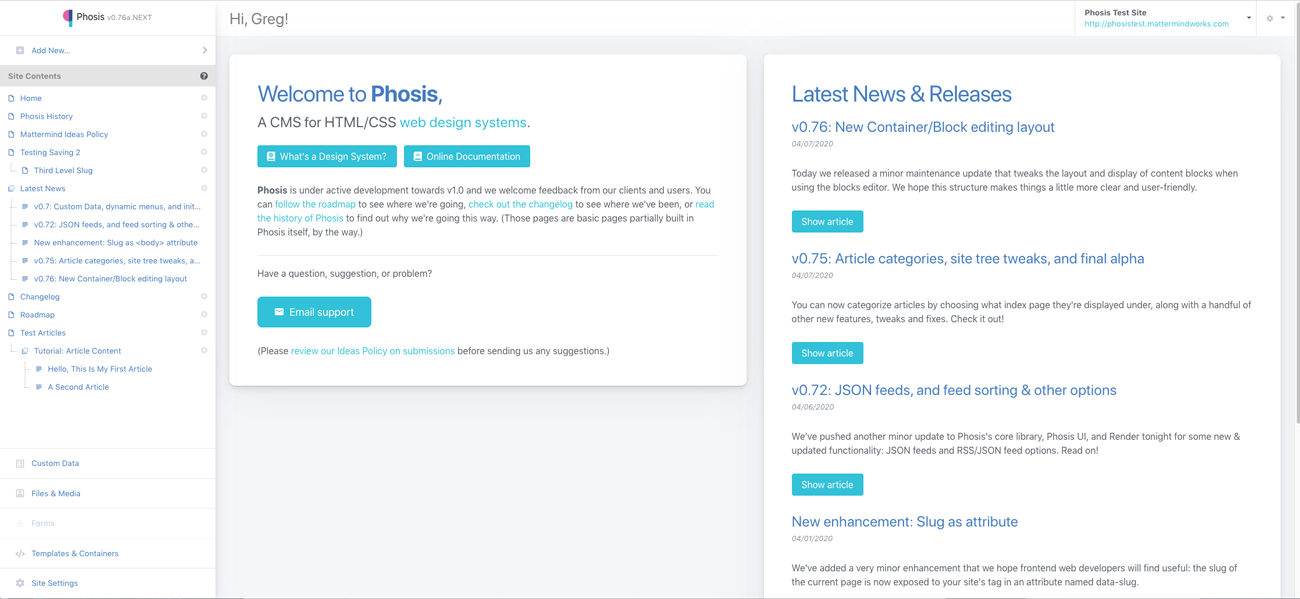
Top bar
The top bar has your current page, your current site & the site/system dropdown menu, and the user menu.
Click the dropdown menu to open your site menu.
The user menu currently only displays the option to Logout and Preferences (where you set your time zone) — but more will be coming here soon!
Sidebar
The Phosis sidebar packs a lot of functionality into a small space. Let’s take it piece by piece top-to-bottom.
1. “Add” shortcut
The Add button quickly brings up the option to add a new page, article, article style, or templates to your site.
2. Your site tree
Next, the sidebar shows you a tree view of your site’s contents.
a. Types of content
Icons next to each item indicate if what you’re looking at is a page, article, or article style:
| Icon | Type | Description | More Info |
|---|---|---|---|
| insert_drive_file | Page | A standard, regular page | Pages |
| flip_to_back | Article Style | Used to tell Phosis how to display an article | Article Styles |
| subject | Article | A blog post, news item, or similar | Articles |
b. Parent & child content
Phosis allows you to drag & drop entries in your site tree to change sort order or to nest pages/articles/article styles beneath each other. You can see what content is nested by following the dotted lines.
When articles or article styles are nested underneath a page and that top-level page is set up to display articles, Phosis will automatically “scope” what it loads to that page’s children only – automatically allowing you to easily set up something like a category or section homepage without having to worry about tags and taxonomy. (More on this in the Built-in Pages/Articles section of the documentation on Using Templates.)
You also use this nested functionality when retrieving JSON/RSS feeds of site content.
Note
Only pages and article styles can have child items, but all three types of items (pages, articles, or article styles) can be nested underneath a page or article styles.
c. Quick add
You can click the add_circle to the right of any page or article style to quickly add child content. If you’re adding an article under an article style by clicking this shortcut, your new article will automatically be assigned to the article style in question!
3. Site actions menu
Beneath your site tree are other options:
a. Content
Click this to see a list of all the content on your site.
b. Forms & Submissions
This page shows you all of the forms that have been configured inside of Phosis along with any responses. You can create/edit forms based on a form template, configuring what emails Phosis should send submissions to, whether or not to email suspected spam/bot submissions, and more. You can also toggle spam status for a submission to help keep your results clear, and to help us train the Phosis spam filters.
c. Custom Data
Custom Data is Phosis’s powerful approach to allowing you to reuse content throughout your site without having multiple copies of that information floating around. You can read more about the Custom Data feature here.
d. Files & Media
Phosis’s Files and Media section lets you upload files to a cloud-powered CDN, with files able to be organized into virtual folders, easy server-side image manipulation based on the URL, and more. You can read the basics about the CDN files or how to use the URL-based image editing features (for developers).
Site Configuration Menu
Under here, you’ll find links to edit your site’s options:
a. Authors
Authors in Phosis are separate and distinct from actual user logins; think of them as a display component. This optional feature allows you to have author names, email addresses, biographies, and profile images that you can use in your templates. Everything except their name is optional, depending on how you’d like to use the information when databinding your templates. You can also set up non-user Authors if you have a single webmaster controlling your site’s content.
b. Templates & Containers
This section stores all of the HTML components that are used to create your site that were covered in the Layouts, Containers, and Templates/Objects of Core Concepts.
c. Site Settings
This is where you can configure your site’s domain names and their behavior, users, and more.
d. Change Sites
Below these menu options is the site selection list.
If you have access to more than one Phosis site, you can toggle between sites from the site/system dropdown menu. Also, if you have administrative access for your system, the site/system dropdown menu will display an “Add Site” button for you.
Footer
Finally, there’s also a footer at the bottom that has the Phosis Changelog, Roadmap & Known Issues, and a shortcut to email Mattermind support.